Learn 2D Game Development in Golang: Beginner


Golang is slowly capturing the attention of developers across the world. As per the Stack Overflow Developer Survey, around 9.55% of the developers have been using Go and it is increasing gradually. Although Golang is widely used for systems programming, backend development, microservices and building of servers, developers have started all sorts of experiments with it. In this blog, we will look at one such aspect, i.e, game development in Golang.
What Library Would I Be Using for the Golang Game?
- In this tutorial blog, I’ll be using a widely used Golang library known as the gonutz/prototype. It represents a basic, minimalistic interface that makes drawing primitives and pictures on the screen easier.
- Furthermore, it allows handling of mouse and keyboard events with ease, and playing sounds.
- One of the most important advantages of this framework is that it is cross-platform, which means that you can write the code on one platform and implement it on any other platform.
- It supports Windows, Linux and Mac currently. And the package has support for keyboard/mouse input, 2D drawing, sprite sheets, sound, etc.
Github Repository: All of the code that is written down in this tutorial blog is accessible on https://github.com/GolangCompany/2dGame.
How to Setup gonutz/prototype?
In order to continue, let us create a new directory inside the go-workspace. Let us name this directory ‘2DGame’. Inside this directory, let us create another folder named ‘setup’. Since I’m using Windows, I’ll go to Command Prompt, and I’ll type:
cd go-workspace
mkdir 2DGame
cd 2DGame
mkdir setup
cd setup
code .
- If you are using Linux or Mac, then you have to resort to Terminal. Once I enter code ., the VS Code opens up. In your case, you might have other text editors or IDEs. Following this, you have to create a Go source file named ‘main.go’.
- Next, you have to go to the Terminal in VS Code to create a go.mod file.
go mod init github.com/golang-company/2DGame
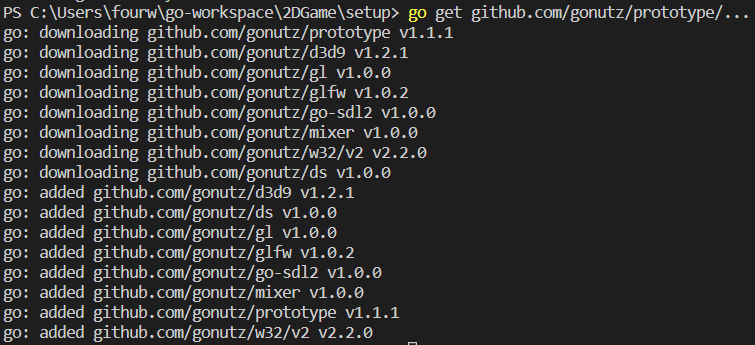
Following the creation of the go.mod file, we will install the library and associated samples
go get github.com/gonutz/prototype/…
Then, we will go to the programming section. For this, we will copy the example from the https://github.com/gonutz/prototype.
1
2
3
4
5
6
7
8
9
10
11
12
13
14
15
16
17
18
19
20
21
22
23
24
25
26
27
28
29
30
31
32
33
34
35
36
37
38
39
40
package main

import (
	"math"

	"github.com/gonutz/prototype/draw"
)

func main() {
	draw.RunWindow("Title", 640, 480, update)
}

func update(window draw.Window) {
	// find the screen center
	w, h := window.Size()
	centerX, centerY := w/2, h/2

	// draw a button in the center of the screen
	mouseX, mouseY := window.MousePosition()
	mouseInCircle := math.Hypot(float64(mouseX-centerX), float64(mouseY-centerY)) < 20
	color := draw.DarkRed
	if mouseInCircle {
		color = draw.Red
	}
	window.FillEllipse(centerX-20, centerY-20, 40, 40, color)
	window.DrawEllipse(centerX-20, centerY-20, 40, 40, draw.White)
	if mouseInCircle {
		window.DrawScaledText("Close!", centerX-40, centerY+25, 1.6, draw.Green)
	}

	// check all mouse clicks that happened during this frame
	for _, click := range window.Clicks() {
		dx, dy := click.X-centerX, click.Y-centerY
		squareDist := dx*dx + dy*dy
		if squareDist <= 20*20 {
			// close the window and end the application
			window.Close()
		}
	}
}
Next, we will take a look at the output. For this, we will type go run main.go. And we get the output:
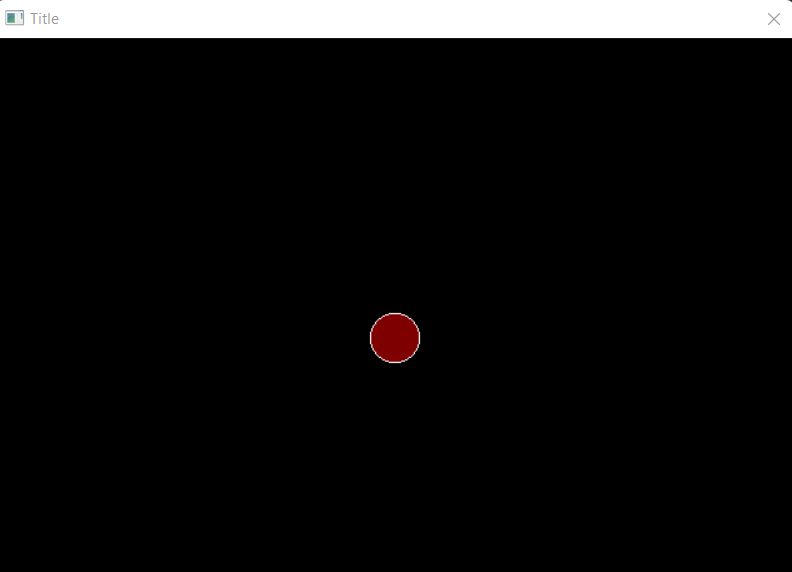
With this, the setup process is complete. Next, we will move on to other aspects of game development in Golang.
How to Type a Simple ‘Hello Everyone’ Program in Golang?
- In this section, we will try to take a look at how we can apply the gonutz/prototype library using a simple program. So, let us get started.
- For this, we will create another folder ‘Hello-everyone’ inside the ‘2DGame’ directory. After creating a Go source file named ‘main.go’. But before we do so, we have to create the go.mod file. So, we’ll type:
go mod init github.com/golang-company/2DGame
- Next, we will install the gonutz/prototype library, so we’ll type
go get github.com/gonutz/prototype/…
Now, we will focus on the main program:
1
2
3
4
5
6
7
8
9
10
11
12
13
14
15
16
17
18
package main

import (
	"github.com/gonutz/prototype/draw"
)

func main() {

	height := 350
	width := 550

	draw.RunWindow("Hello everyone ", width, height,
            func(window draw.Window) {
			window.DrawText("Hello everyone", 0, 0, draw.White)
		},
	)

}- Ok, so let us understand what we are doing in this program. We have imported the library github.com/gonutz/prototype/draw.
- Then we are moving on to function main, where we will write the main logic of the program. We have first described the height and width.
- We are able to use the draw.RunWindow as the package draw consists of the RunWindow function. So what is its purpose? Well, you should call it in the main function to open a window. You provide it a callback, which is executed at 60 frames per second. You receive a Window from the callback that you may use to handle input, generate images, and output audio.
- In the function draw.RunWindow, we are passing “Sample -App | Hello everyone”, width, height and a func (window draw.Window). Now, the draw.Window will allow you to draw simple images and primitives, play sounds and handle different mouse and keyboard events.
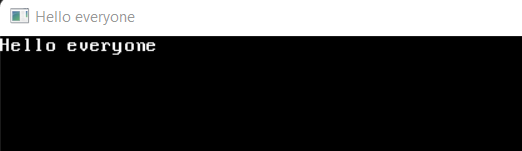
- window.DrawText function helps in drawing formatted text as per the specified method. You can use this because of the w32 package which acts as the wrapper for numerous Windows APIs.
Output:
Now, if you face any issues while running the program by typing go run main.go, you have to go to the go.mod file and you have to upgrade transitive dependencies and direct dependencies available above require github.com/gonutz/prototype v1.1.1. This will resolve your issue.
How to Add Motion to Element in a Golang Game?
In this section, we will delve deep into game development in Golang. For this, we will create another folder in the ‘2DGame’ directory. And we will name this ‘motion’. Next, we will follow the same process as before, create a go.mod file and install the gonutz/prototype library. Following this, we will move on to the main.go source file. We will type the following program.
1
2
3
4
5
6
7
8
9
10
11
12
13
14
15
16
17
18
19
20
package main

import "github.com/gonutz/prototype/draw"

func main() {

	title := "Text in motion"
	height := 350
	width := 350
	i := 0
	draw.RunWindow(title, height, width, func(window draw.Window) {
		i++

	window.FillEllipse(i%height, i%width, i%width, i%height, draw.Color{float32(i % 7),
			float32(i % 11),
			float32(i % 17),
			1,
		})
	})
}- After we have imported the github.com/gonutz/prototype/draw, we go straight to the main function. We write the title and assign values to height and width. Then we take a variable i and initialize it to 0.
- As explained in the previous section, we are using the draw.RunWindow function where we pass the necessary parameters. And then we increment the value of i. This will essentially increase the size of the ellipse that we are creating.
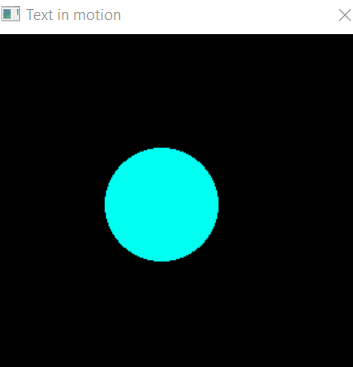
- Next, we try to change the color of the Ellipse. The FillEllipse function almost behaves like a DrawEllipse. But there is a difference. Instead of drawing the outline, it fills the ellipse with color. And it is defined by width and height.
- The change in sizes and the color in the filled Ellipse is represented by float32(i%7), float32(i%11), float32(i%17), and 1. Thus, we will get the output like this:
How to Capture Keyboard Inputs for Game Development in Golang?
In this section, we will create another folder named ‘keyboards’ inside the ‘2DGame’ and following this, we will create the go.mod file and install the gonutz/prototype library. Next, we will move on to the main.go file.
And we will write the program below.
1
2
3
4
5
6
7
8
9
10
11
12
13
14
15
16
17
18
19
20
21
22
23
24
25
26
27
package main
import "github.com/gonutz/prototype/draw"
func main() {
title := "Text in motion"
height := 300
width := 300
CurrentX := width / 2
CurrentY := height / 2
draw.RunWindow(title, height, width, func(window draw.Window) {
if window.IsKeyDown(draw.KeyDown) {
CurrentY += 1
} else if window.IsKeyDown(draw.KeyUp) {
CurrentY -= 1
} else if window.IsKeyDown(draw.KeyLeft) {
CurrentX -= 1
} else if window.IsKeyDown(draw.KeyRight) {
CurrentX += 1
}
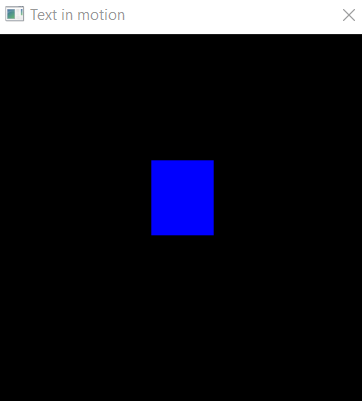
window.FillRect(CurrentX, CurrentY, 50, 60, draw.Blue)
})
}- Ok, let us delve into this chunk of code. We are taking two variables CurrentX and CurrentY, and we are assigning values to them. Next, we write down the draw.RunWindow function and pass the necessary parameters.
- Then we create a static rectangle. The window.FillRect() will help you in drawing a filled rectangle. We then pass the parameters CurrentX, CurrentY, 50, 60 and draw.Blue. We are highlighting the dimensions and specifying that the color to be filled up with should be blue.
- Next, we move on to the if else statements. Since this program is intended to take keyboard inputs, we will program accordingly.
- For the downward motion, we will use
if window.IsKeyDown(draw.KeyDown) {
CurrentY += 1
And we will decrease the value of Y which will make the rectangle go up.
For the right side motion, we will use
else if window.IsKeyDown(draw.KeyRight) {
CurrentX += 1
And we will increase the value of X which will make the rectangle go right.
For the left side motion, we will use
else if window.IsKeyDown(draw.KeyLeft) {
CurrentX -= 1
And we will decrease the value of X which will make the rectangle go left.
Here, the window.IsKeyDown is used to determine the condition/state of the specific key. In this case, the Return key is transferred to the IsKeyDown method.
How to Capture Mouse Inputs for Game Development in Golang?
We will be following the same steps as before, only this time we will name the folder ‘mouse’. The program that we will type in the main.go file is:
1
2
3
4
5
6
7
8
9
10
11
12
13
14
15
16
17
18
19
20
21
22
23
24
25
package main
import "github.com/gonutz/prototype/draw"
func main() {
title := "Capture mouse input"
height := 300
width := 300
rectXCord := 0
rectYCord := 0
rectHeight := 30
rectWidth := 60
draw.RunWindow(title, height, width, func(window draw.Window) {
rectXCord, rectYCord = window.MousePosition()
rectXCord = rectXCord - 30
rectYCord = rectYCord - 15
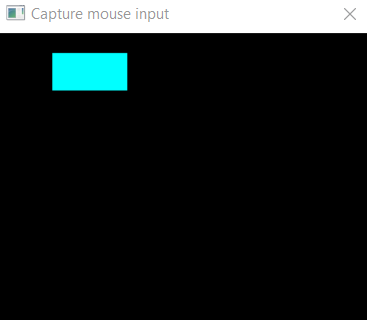
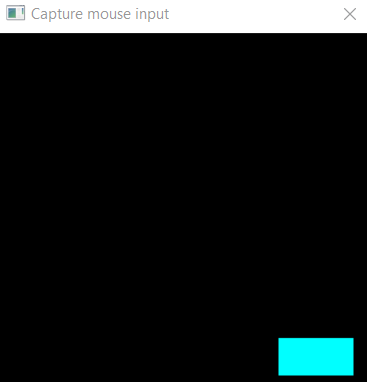
window.FillRect(rectXCord, rectYCord, rectWidth, rectHeight, draw.Cyan)
})
}- Ok, time to understand this program. As understandable, we have imported the required library. Following this, we have assigned a string to the ‘title’, and values to height and width.
- Next, we are defining the rectangle. We have defined the initial position of the rectangle and we have stated the height and width of the rectangle as well. Following this, we write the draw.RunWindow function as you have seen in the previous cases.
- In order to move the pointer with the help of the mouse, we will type rectXCord, rectYCord = window.MousePosition().
- If we wish to move the pointer in the middle of the frame, then we will write:
rectXCord = rectXCord - 30
rectYCord = rectYCord - 15
- The next command will help us render the rectangle on the frame. window.FillRect(rectXCord, rectYCord, rectWidth, rectHeight, draw.Cyan)
Now, let us check out the output.
Output:
How to Add Sound for Game Development in Golang?
We will create a folder called ‘sound’ and write the program in main.go.
1
2
3
4
5
6
7
8
9
10
11
12
13
14
15
16
17
18
19
20
21
22
package main
import "github.com/gonutz/prototype/draw"
func main() {
title := "Text in motion"
height := 350
width := 350
draw.RunWindow(title, height, width, func(window draw.Window) {
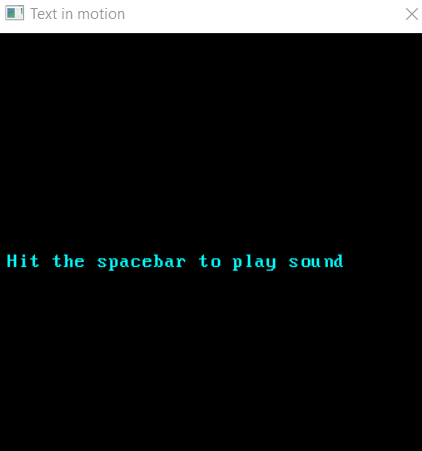
window.DrawText("Hit the spacebar to play sound",
10,
height/2,
draw.Cyan)
if window.IsKeyDown(draw.KeySpace) {
window.PlaySoundFile("./sound.wav")
}
})
}- Till draw.RunWindow function, the commands are the same as for the ones above. The window.DrawText function helps in drawing a text string. You will not get to see the drawing of new line characters, but you will see a line break. But you will see that the next character is drawn on the line starting at 10. And we have also passed height and color parameters.
- The window.IsKeyDown helps in reporting of the state of the specified key. It checks which key is held down when the function is called. The Key represents a key on the keyboard and we are considering the spacebar.
- The PlaySoundFile only reproduces the WAV sounds. In case, the file is not found or has a different format other than .WAV format, it returns an error. And we are taking the sound from the sound.wav file.
Output:
Hopefully, you were able to understand the basic concepts of the game development using the Golang programming language. Once you get a hold of the preliminary concepts, you will be able to work on intricate projects. And soon, you will learn how to add png images, scale and rotate it and use sprite sheets. Until then, master the initial concepts and keep on programming.


Build Your Golang Team