How to use Gorilla Mux in different Packages


Gorilla Mux is a powerful HTTP router for building modern Go web servers. It is an essential package for building HTTP APIs and web applications in Go, and it is widely used in the Go community. In this blog post, You will understand, how to use Gorilla Mux in different packages, starting with a simple example that will explain an API Creation using Gorilla Mux.
I will create an API and explain the code to make you aware of the facts that how you can use the Gorilla Mux in different packages while coding. Your awareness of the potential applications of this language in areas like golang mobile development, web development, and game development may be expanded by reading this blog. Before proceeding with the tutorial blog, I would like to request you kindly, go through the prerequisites or the essential requirements you need to be prepared with to grab the concept in a proper manner.
Essentials
To use Gorilla Mux in different packages, you should have a basic understanding of the following concepts:
- Go programming language: Gorilla Mux is a package written in Go, so you should have a basic understanding of the Go language and syntax.
- HTTP protocol: Gorilla Mux is used to build HTTP servers, so you should have a basic understanding of the HTTP protocol and how it works.
- Web development concepts: Gorilla Mux is used to build web applications and APIs, so you should have a basic understanding of web development concepts such as routing, middleware, static file serving, and handling different HTTP methods.
- Go web server development: Gorilla Mux is used to build Go web servers, so you should have a basic understanding of how to create and run a Go web server.
- It is also recommended to have Go installed on your development machine and set up your Go development environment before using Gorilla Mux.
- Additionally, it is helpful to have a text editor or integrated development environment (IDE) installed to write and edit your Go code. Some popular options include Visual Studio Code and GoLand. I will be using Visual Studio Code Editor for my project.
After getting prepared with the above essentials, I hope it would be easier for you to grab the concept and gain a proper outcome through this tutorial blog. Now let us proceed toward setting up our project environment.
Setting Up the Work-Space
My main objective here will be to build a POST API for the explanation. In this section, I will explain how you can begin by setting up a directory and adding dependencies for it. Therefore to begin with you need to open up your command prompt and use the following command to set up your directory,
"cd Desktop" (This command will navigate you to Desktop)
"mkdir Gin-Mux" (This command will create the directory for your project)
"cd Gin-Mux" (This command will navigate you to Gin-Mux Directory)
"go mod init github.com/golangcompany/Gin-Mux" (This command will create a mod file)
"go get github.com/gorilla/mux" (This command will import the Gorilla Mux Package)
"go get go.mongodb.org/mongo-driver/mongo" (This command will import MongoDB Package)
"code ." (This command will pop up the IDE on your screen and you can start with your coding)
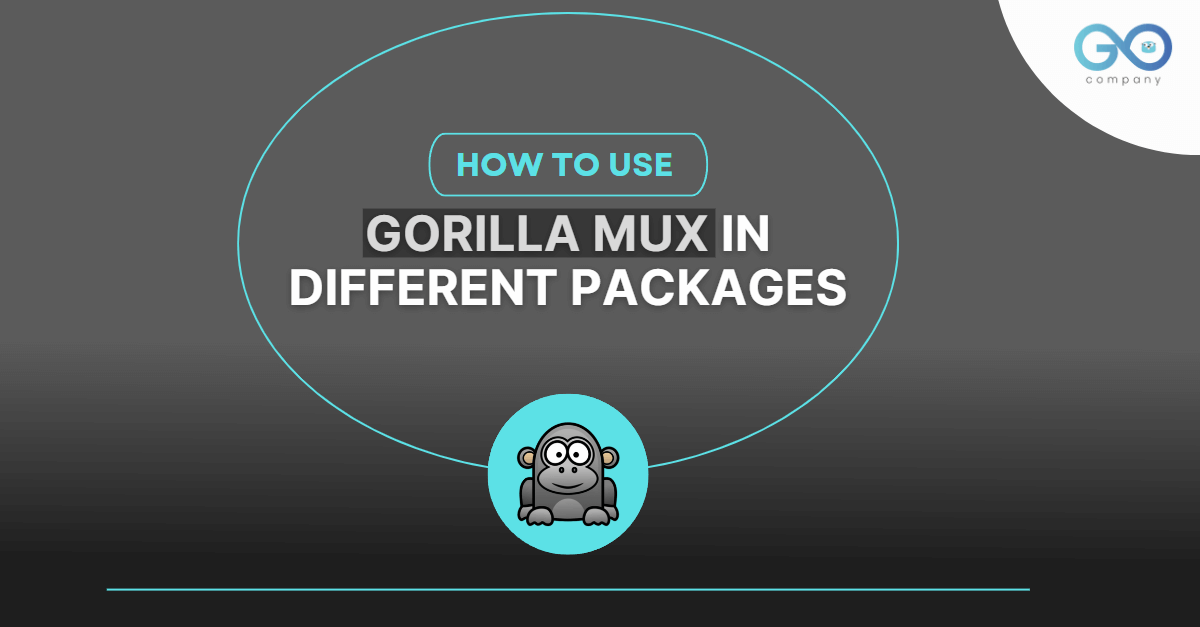
These were the commands which you need to insert initially, to begin with, your project. Now, let's proceed toward the structure of the directory. For this, you can refer to Image 1 for a better understanding that how you can create the structure of your project directory.
[Image 1]
Here we have main.go in the main directory and 3 other folders, i.e., controller, database, and models. Here models will hold up the struct which will have the fields init. Controllers will have the functions defined for the API. The database will contain the code which will connect our application to the database i.e., MongoDB in my case. Now we can start to code from the main.go file.
Starting from the main.go
1
2
3
4
5
6
7
8
9
10
11
12
13
14
15
16
package main

import (
    "net/http"

    "github.com/golangcompany/Gin-Mux/controller"
    "github.com/gorilla/mux"
)

func main() {

    r := mux.NewRouter()
    r.HandleFunc("/createuser", controller.CreateUser).Methods("POST")

    http.ListenAndServe(":8080", r)
}
According to the URL and HTTP method, this code configures an HTTP server using Gorilla Mux and routes requests to various handler functions. The relevant packages, such as "net/http" and "github.com/gorilla/mux," which represent the standard HTTP package and Gorilla Mux package, respectively, are imported by the import statements at the top of the code. The handler functions for the routes are located in the imported "github.com/golangcompany/Gin-Mux/controller" package. The beginning of the program serves as its primary function. When the program is run, it is called. The "mux.NewRouter function" is used to construct a new router in the main function's opening line. HTTP requests will be handled by this router. The next lines use the "r.HandleFunc" function to route requests to different handler functions based on the URL and HTTP method. The first line routes POST requests to the "/createuser" URL to the controller.CreateUser handler function. The final line starts the HTTP server using the http.ListenAndServe function. This function takes a port number and a handler as arguments, and it starts an HTTP server that listens for requests on the specified port and passes them to the handler to be processed. In this case, the handler is the router we created earlier. This code will start an HTTP server on port 8080, and requests to the server will be handled by the router and routed to the appropriate handler function based on the URL and HTTP method. Then, I will be proceeding toward creating the models for the project in the next section.
Models & Database
1
2
3
4
5
6
package models

type User struct {
    Name string `json:"name" bson:"name"`
    Age  int    `json:"age" bson:"age"`
}
The above code defines a User struct type in the models package. The User struct has two fields:
- Name: a string field that represents the name of the user. The json:"name" and bson:"name" tags specify that this field should be serialized as "name" when converting the struct to and from JSON and BSON (Binary JSON) formats.
- Age: an int field that represents the age of the user. The json:"age" and bson:"age" tags specify that this field should be serialized as "age" when converting the struct to and from JSON and BSON formats.
The User struct can be used to represent a user in your application and store user information. It can be serialized to and from JSON and BSON formats for storage or transmission over the network.
Regarding the database setup, you can visit my other blog for reference i.e., How to connect the Golang Application with MongoDB.
Establishing Controllers
1
2
3
4
5
6
7
8
9
10
11
12
13
14
package controller

import (
    "context"
    "encoding/json"
    "net/http"
    "strconv"

    "github.com/golangcompany/Gin-Mux/database"
    "github.com/golangcompany/Gin-Mux/models"
    "github.com/gorilla/mux"
    "go.mongodb.org/mongo-driver/mongo"
    "gopkg.in/mgo.v2/bson"
)
In this section, I will be explaining, how you can write the code for the controller file. To begin with, you need to import a few packages as mentioned above and then declare a Collection variable with the type "*mongo.Collection." The outcome of using the "database.UserData" function, which accepts a "database.Client" variable and a string denoting the collection's name as inputs, is set as the value of the Collection variable. The function "database.UserData" is a helper function that returns a collection from the database using the supplied client and collection name. The "database.Client" variable is a client for a MongoDB database. The specified collection in the MongoDB database can be referred to throughout the remaining code by using the Collection variable. It is able to be used to carry out actions on the collection, such as adding, modifying, or deleting documents.
1
2
3
4
5
6
7
8
9
10
11
12
13
14
15
func CreateUser(w http.ResponseWriter, r *http.Request) {
    decoder := json.NewDecoder(r.Body)
    var user models.User
    err := decoder.Decode(&user)
    if err != nil {
        w.WriteHeader(http.StatusBadRequest)
        return
    }
    _, err = Collection.InsertOne(context.TODO(), user)
    if err != nil {
        http.Error(w, err.Error(), http.StatusInternalServerError)
        return
    }
    w.WriteHeader(http.StatusOK)
}
Then I defined a function named “CreateUser” that handles HTTP POST requests. The function has two parameters i.e., “w” which is an http.ResponseWriter interface that allows the function to write the HTTP response and “r” that is an *http.Request pointer that represents the HTTP request. The function creates a new json.Decoder using the json.NewDecoder function and the request body and then declare a variable user of type models.User to store the decoded user data. After that, it calls the Decode method on the decoder to decode the request body into the user variable. If any error occurs while decoding the request body, the function writes a "400 Bad Request" HTTP status code to the response and returns otherwise calls the InsertOne method on the Collection variable to insert a new document into the collection. If an error occurs while inserting the document, the function writes a "500 Internal Server Error" HTTP status code and the error message to the response and returns. If no errors occur, the function writes a "200 OK" HTTP status code to the response.
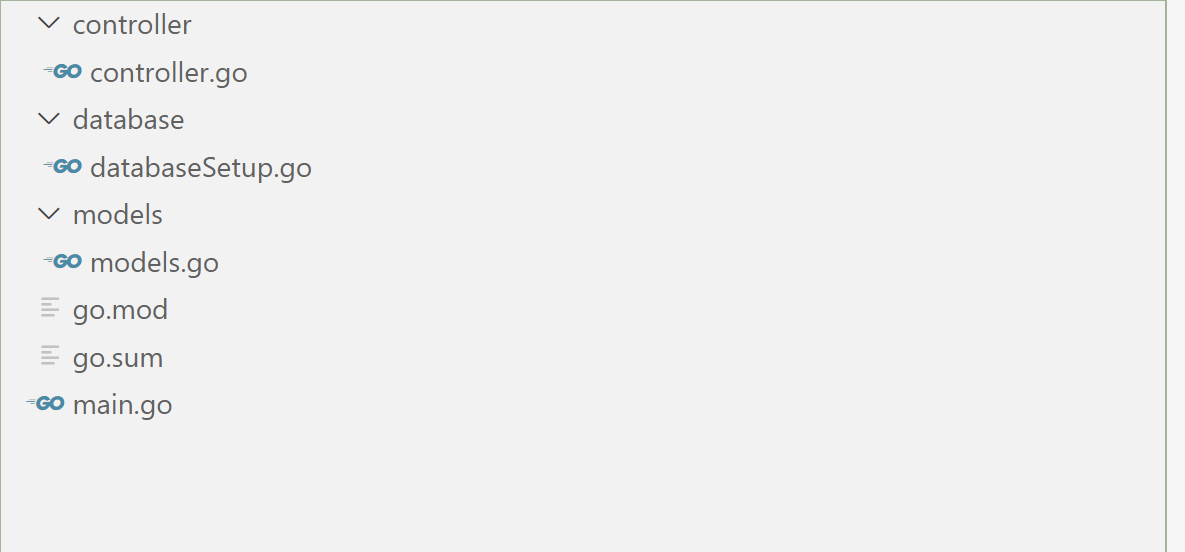
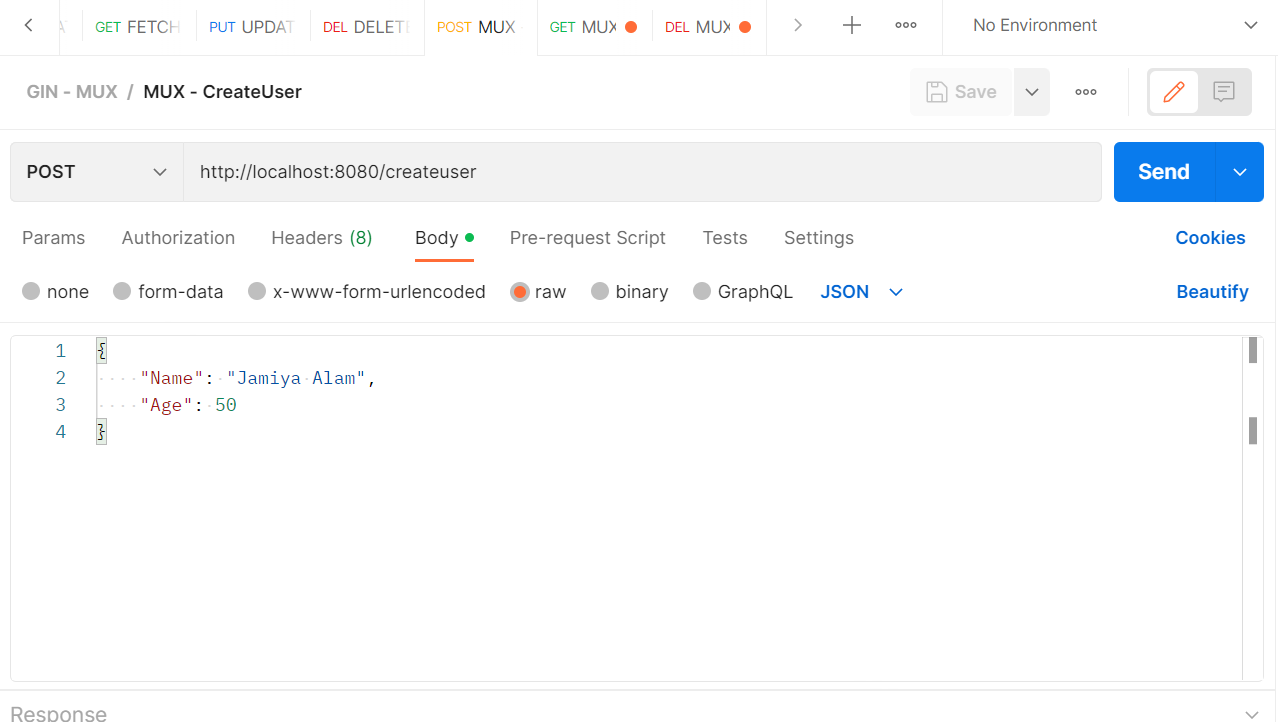
This was the overall explanation regarding the code, I have pasted the snaps of the Postman Application in which, I have tested the API. Image 2 is the snap for the Postman Application where you need to Hit the API and image 3 is the snap of the collections in MongoDB Atlas. Please refer to Images 2 and 3 for a better understanding of the outcome. Hope this blog was helpful for your learning.
[Image 2]
[Image 2]


Build Your Golang Team